Laravel 10: Пример CRUD с Tailwind CSS
Шаг 1. Устанавливаем Laravel и подключаем базу данных.
Подробную инструкцию по установке PHP 8.2 вы можете найти в статье Как установить PHP 8.2 на Debian/Ubuntu.
Перейдите в каталог, где хотите разместить новый проект Laravel 10. Для установки необходимо выбрать имя проекта (пусть будет laravel-crud) и выполнить следующую команду:
composer create-project laravel/laravel laravel-crudТеперь необходимо подключить приложение к базе данных. Если вы используете MySQL, то откройте файл конфигурации среды .env, размещённый в корневом каталоге проекта, и добавьте следующие данные:
DB_CONNECTION=mysql
DB_HOST=127.0.0.1
DB_PORT=3306
DB_DATABASE=имя_базы_данных
DB_USERNAME=пользователь_базы_данных
DB_PASSWORD=пароль_пользователя_базы_данных
Если не хотите для тестового проекта устанавливать и настраивать серьёзную
базу данных, то можно использовать sqlite. Её настройки значительно упрощаются:
DB_CONNECTION=sqlite
DB_DATABASE=полный_путь_к_файлу_базы_данных.sqlite
Шаг 2. Устанавливаем Laravel Breeze и Tailwind CSS
Устанавливаем Laravel Breeze, через Composer:
composer require laravel/breeze --devДалее запускам инсталляцию Laravel Breeze следующей командой Artisan:
php artisan breeze:installНа вопрос, какой стек установить отвечаем 0 — Blade:
Which stack would you like to install?
 blade .............................................. 0
 react .............................................. 1
 vue ................................................ 2
 api ................................................ 3
❯ 0
Также можно добавить поддержку тёмного режима и Pest тесты:
 Would you like to install dark mode support? (yes/no) [no]
❯ yes

 Would you prefer Pest tests instead of PHPUnit? (yes/no) [no]
❯ yes
Шаг 3. Создаём Модель, Миграции, Ресурсный Контроллера и Маршруты
Запустите следующую команду для создания Модели, Миграции и Контроллера Post:
php artisan make:model Post -mcrОткройте файл миграции в каталоге database/migrations/, имя файла состоит из даты, времени и выполненной операции разделённых символом подчёркивания _ (так всегда можно определить время создания миграции). Это будет самая последняя из созданных миграций, у меня это 2023_03_30_131419_create_posts_table.php. Добавьте следующие строки:
<?php

use Illuminate\Database\Migrations\Migration;
use Illuminate\Database\Schema\Blueprint;
use Illuminate\Support\Facades\Schema;

return new class extends Migration
{
    /**
     * Run the migrations.
     */
    public function up(): void
    {
        Schema::create('posts', function (Blueprint $table) {
            $table->id();
            $table->string('title');
            $table->string('slug');
            $table->text('content');
            $table->timestamps();
        });
    }

    /**
     * Reverse the migrations.
     */
    public function down(): void
    {
        Schema::dropIfExists('posts');
    }
};
Добавьте миграции к базе данных:
php artisan migrateОткройте файл модели app/Models/Post.php и приведите к следующему виду:
<?php

namespace App\Models;

use Illuminate\Database\Eloquent\Factories\HasFactory;
use Illuminate\Database\Eloquent\Model;

class Post extends Model
{
    use HasFactory;

    protected $fillable = [
        'title',
        'slug',
        'content',
    ];

}
Приведите контроллер PostController к следующему виду.
app/Http/Controllers/PostController.php:
<?php

namespace App\Http\Controllers;

use App\Models\Post;
use Illuminate\Http\RedirectResponse;
use Illuminate\Http\Request;
use Illuminate\Http\Response;
use Illuminate\View\View;


class PostController extends Controller
{
    /**
     * Display a listing of the resource.
     */
    public function index(): View
    {
        $posts = Post::latest()->paginate(10);

        return view('posts.index', compact('posts'));
    }

    /**
     * Show the form for creating a new resource.
     */
    public function create(): View
    {
        return view('posts.create');
    }

    /**
     * Store a newly created resource in storage.
     */
    public function store(Request $request): RedirectResponse
    {
        $request->validate([
            'title' => 'required|string|max:255',
            'slug' => 'required|string|max:255',
            'content' => 'required'
        ]);

        Post::create([
            'title' => $request->title,
            'slug' => \Str::slug($request->slug),
            'content' => $request->content,
        ]);

        return redirect()->route('posts.index')->with('status', 'Post Created Successfully');
    }

    /**
     * Display the specified resource.
     */
    public function show(Post $post): View
    {
        return view('posts.show', compact('post'));
    }

    /**
     * Show the form for editing the specified resource.
     */
    public function edit(Post $post): View
    {
        return view('posts.edit', compact('post'));
    }

    /**
     * Update the specified resource in storage.
     */
    public function update(Request $request, Post $post): RedirectResponse
    {
        $request->validate([
            'title' => 'required|string|max:255',
            'slug' => 'required|string|max:255',
            'content' => 'required'
        ]);

        $post->title = $request->title;
        $post->slug = \Str::slug($request->slug);
        $post->content = $request->content;
        $post->save();

        return redirect()->route('posts.index')->with('status', 'Post Updated Successfully');
    }

    /**
     * Remove the specified resource from storage.
     */
    public function destroy(Post $post): RedirectResponse
    {
        $post->delete();

        return redirect()->route('posts.index')->with('status', 'Post Delete Successfully');
    }
}
Приведите файл маршрутов routes/web.php к следующему виду:
<?php

use App\Http\Controllers\ProfileController;
use App\Http\Controllers\PostController;
use Illuminate\Support\Facades\Route;

/*
|--------------------------------------------------------------------------
| Web Routes
|--------------------------------------------------------------------------
|
| Here is where you can register web routes for your application. These
| routes are loaded by the RouteServiceProvider within a group which
| contains the "web" middleware group. Now create something great!
|
*/

Route::get('/', function () {
    return view('welcome');
});

Route::get('/dashboard', function () {
    return view('dashboard');
})->middleware(['auth', 'verified'])->name('dashboard');

Route::middleware('auth')->group(function () {
    Route::get('/profile', [ProfileController::class, 'edit'])->name('profile.edit');
    Route::patch('/profile', [ProfileController::class, 'update'])->name('profile.update');
    Route::delete('/profile', [ProfileController::class, 'destroy'])->name('profile.destroy');
    Route::resource('posts', PostController::class);
});

require __DIR__.'/auth.php';
Шаг 4. Создайте файл представления Blade для CRUD
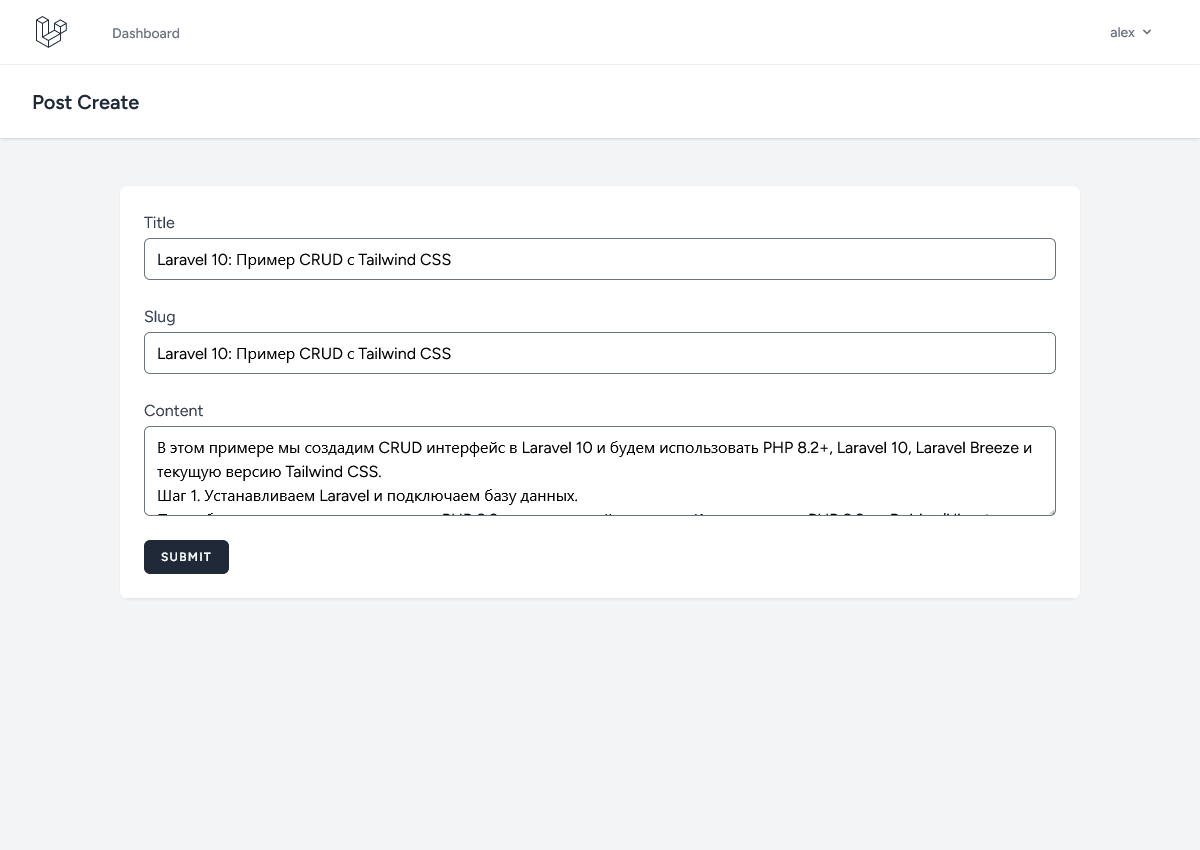
Создаём файл resources/views/posts/create.blade.php со следующим содержимым:
<x-app-layout>
    <x-slot name="header">
        <h2 class="text-xl font-semibold leading-tight text-gray-800">
            {{ __('Post Create') }}
        </h2>
    </x-slot>

    <div class="py-12">
        <div class="mx-auto max-w-5xl sm:px-6 lg:px-8">
            <div class="overflow-hidden bg-white shadow-sm sm:rounded-lg">
                <div class="p-6 bg-white border-b border-gray-200">
                    <form method="POST" action="{{ route('posts.store') }}">
                        @csrf
                        <div class="mb-6">
                            <label class="block">
                                <span class="text-gray-700">Title</span>
                                <input type="text" name="title" class="block w-full mt-1 rounded-md" placeholder=""
                                    value="{{ old('title') }}" />
                            </label>
                            @error('title')
                                <div class="text-sm text-red-600">{{ $message }}</div>
                            @enderror
                        </div>
                        <div class="mb-6">
                            <label class="block">
                                <span class="text-gray-700">Slug</span>
                                <input type="text" name="slug" class="block w-full mt-1 rounded-md" placeholder=""
                                    value="{{ old('slug') }}" />
                            </label>
                            @error('slug')
                                <div class="text-sm text-red-600">{{ $message }}</div>
                            @enderror
                        </div>
                        <div class="mb-6">
                            <label class="block">
                                <span class="text-gray-700">Content</span>
                                <textarea id="editor" class="block w-full mt-1 rounded-md" name="content" rows="3">{{ old('content') }}</textarea>
                            </label>
                            @error('content')
                                <div class="text-sm text-red-600">{{ $message }}</div>
                            @enderror
                        </div>
                        <x-primary-button type="submit">
                            Submit
                        </x-primary-button>

                    </form>
                </div>
            </div>
        </div>
    </div>
</x-app-layout>
Итоговая страница будет выглядеть так:
Создаём файл 'resources/views/posts/index.blade.php':
<x-app-layout>
    <x-slot name="header">
        <h2 class="text-xl font-semibold leading-tight text-gray-800">
            {{ __('Posts') }}
        </h2>
    </x-slot>

    <div class="py-12">
        <div class="mx-auto max-w-5xl sm:px-6 lg:px-8">
            <div class="overflow-hidden bg-white shadow-sm sm:rounded-lg">
                <div class="p-6 bg-white border-b border-gray-200">
                    @if (session()->has('status'))
                    <div class="flex justify-center items-center">

                        <p class="ml-3 text-sm font-bold text-green-600">{{ session()->get('status') }}</p>
                    </div>
                    @endif

                    <div class="mt-1 mb-4">

                        <x-primary-button>
                            <a href="{{ route('posts.create') }}">{{ __('Add Post') }}</a>
                        </x-primary-button>
                    </div>
                    <div class="relative overflow-x-auto shadow-md sm:rounded-lg">
                        <table class="w-full text-sm text-left text-gray-500 dark:text-gray-400">
                            <thead
                                class="text-xs text-gray-700 uppercase bg-gray-50 dark:bg-gray-700 dark:text-gray-400">
                                <tr>
                                    <th scope="col" class="px-6 py-3">
                                        #
                                    </th>
                                    <th scope="col" class="px-6 py-3">
                                        Title
                                    </th>
                                    <th scope="col" class="px-6 py-3">
                                        Edit
                                    </th>
                                    <th scope="col" class="px-6 py-3">
                                        Delete
                                    </th>
                                </tr>
                            </thead>
                            <tbody>
                                @foreach ($posts as $post)
                                <tr class="bg-white border-b dark:bg-gray-800 dark:border-gray-700">
                                    <th scope="row"
                                        class="px-6 py-4 font-medium text-gray-900 dark:text-white whitespace-nowrap">
                                        {{ $post->id }}
                                    </th>
                                    <td class="px-6 py-4">
                                        {{ $post->title }}

                                    </td>
                                    <td class="px-6 py-4">
                                        <a href="{{ route('posts.edit', $post->id) }}">Edit</a>
                                    </td>
                                    <td class="px-6 py-4">
                                        <form action="{{ route('posts.destroy', $post->id) }}" method="POST"
                                            onsubmit="return confirm('{{ trans('are You Sure ? ') }}');"
                                            style="display: inline-block;">
                                            <input type="hidden" name="_method" value="DELETE">
                                            <input type="hidden" name="_token" value="{{ csrf_token() }}">
                                            <input type="submit" class="px-4 py-2 text-white bg-red-700 rounded"
                                                value="Delete">
                                        </form>
                                    </td>
                                </tr>
                                @endforeach
                            </tbody>
                        </table>
                    </div>

                </div>
            </div>
        </div>
    </div>
</x-app-layout>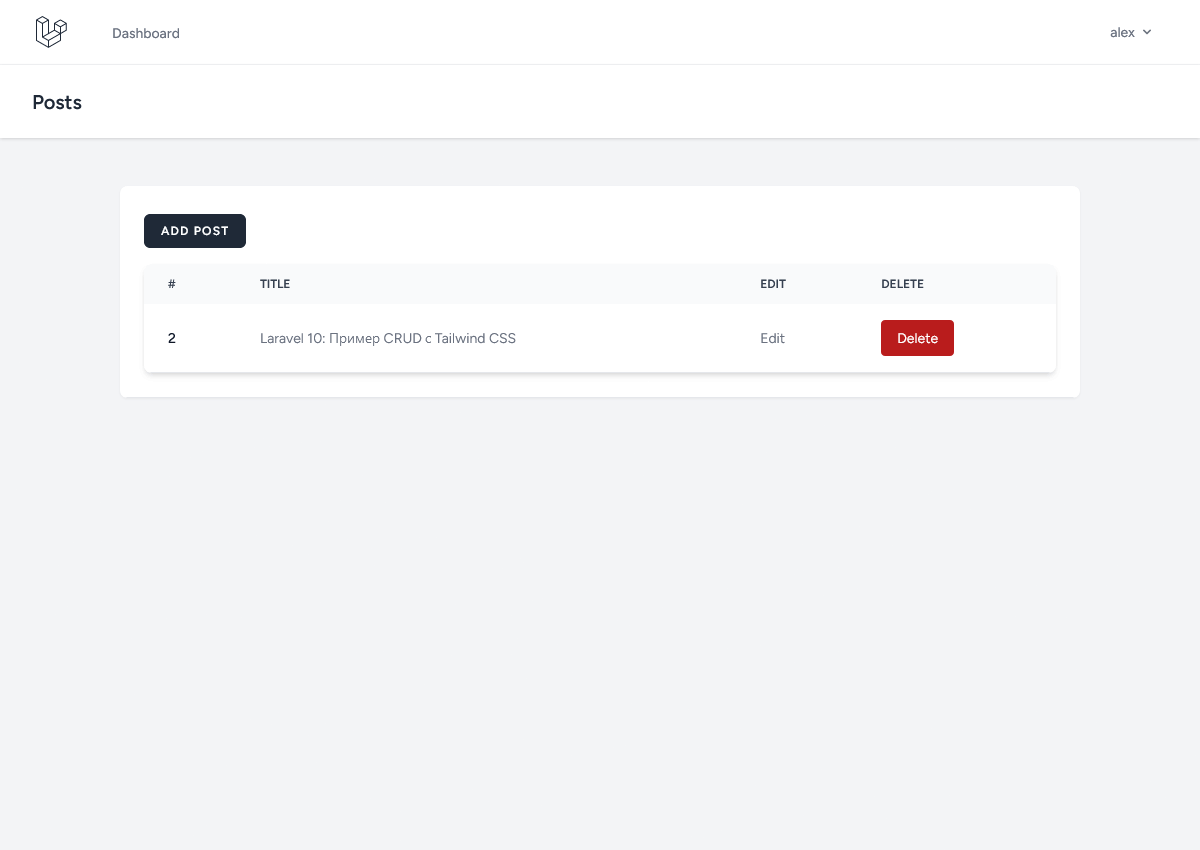
Создаём файл resources/views/posts/edit.blade.php:
<x-app-layout>

    <x-slot name="header">
        <h2 class="text-xl font-semibold leading-tight text-gray-800">
            {{ __('Category Edit') }}
        </h2>
    </x-slot>

    <div class="py-12">
        <div class="mx-auto max-w-5xl sm:px-6 lg:px-8">
            <div class="overflow-hidden bg-white shadow-sm sm:rounded-lg">
                <div class="p-6 bg-white border-b border-gray-200">
                    <form method="POST" action="{{ route('posts.update',$post->id) }}">
                        @csrf
                        @method('put')
                        <div class="mb-6">
                            <label class="block">
                                <span class="text-gray-700">Title</span>
                                <input type="text" name="title"
                                    class="block w-full mt-1 rounded-md"
                                    placeholder="" value="{{old('title',$post->title)}}" />
                            </label>
                            @error('title')
                            <div class="text-sm text-red-600">{{ $message }}</div>
                            @enderror
                        </div>
                        <div class="mb-6">
                            <label class="block">
                                <span class="text-gray-700">Slug</span>
                                <input type="text" name="slug"
                                    class="block w-full mt-1 rounded-md"
                                    placeholder="" value="{{old('slug',$post->slug)}}" />
                            </label>
                            @error('slug')
                            <div class="text-sm text-red-600">{{ $message }}</div>
                            @enderror
                        </div>
                        <div class="mb-6">
                            <label class="block">
                                <span class="text-gray-700">Content</span>
                                <textarea id="editor" class="block w-full mt-1 rounded-md" name="content"
                                    rows="3">{{ $post->content}}</textarea>
                            </label>
                            @error('content')
                            <div class="text-sm text-red-600">{{ $message }}</div>
                            @enderror
                        </div>

                        <x-primary-button type="submit">
                            Update
                        </x-primary-button>

                    </form>
                </div>
            </div>
        </div>
    </div>
</x-app-layout>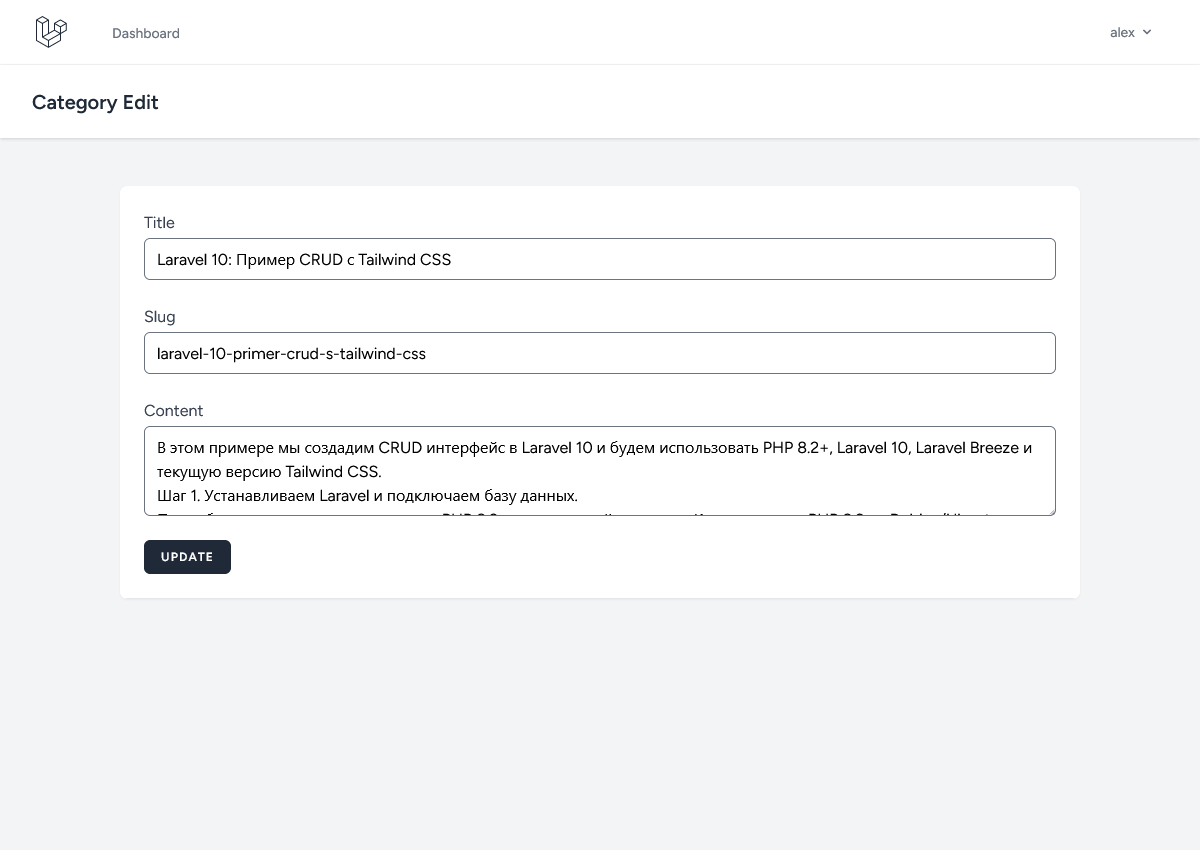
Шаг 5. Запуск сервера Laravel c Vite
Для запуска локального сервера выполните в терминале следующие команды.
Для сборки ресурсов выполните команду:
npm run buildДля запуска локального сервера (без установки сервера apache/nginx/ и т.д.) можно воспользоваться командой Artisan:
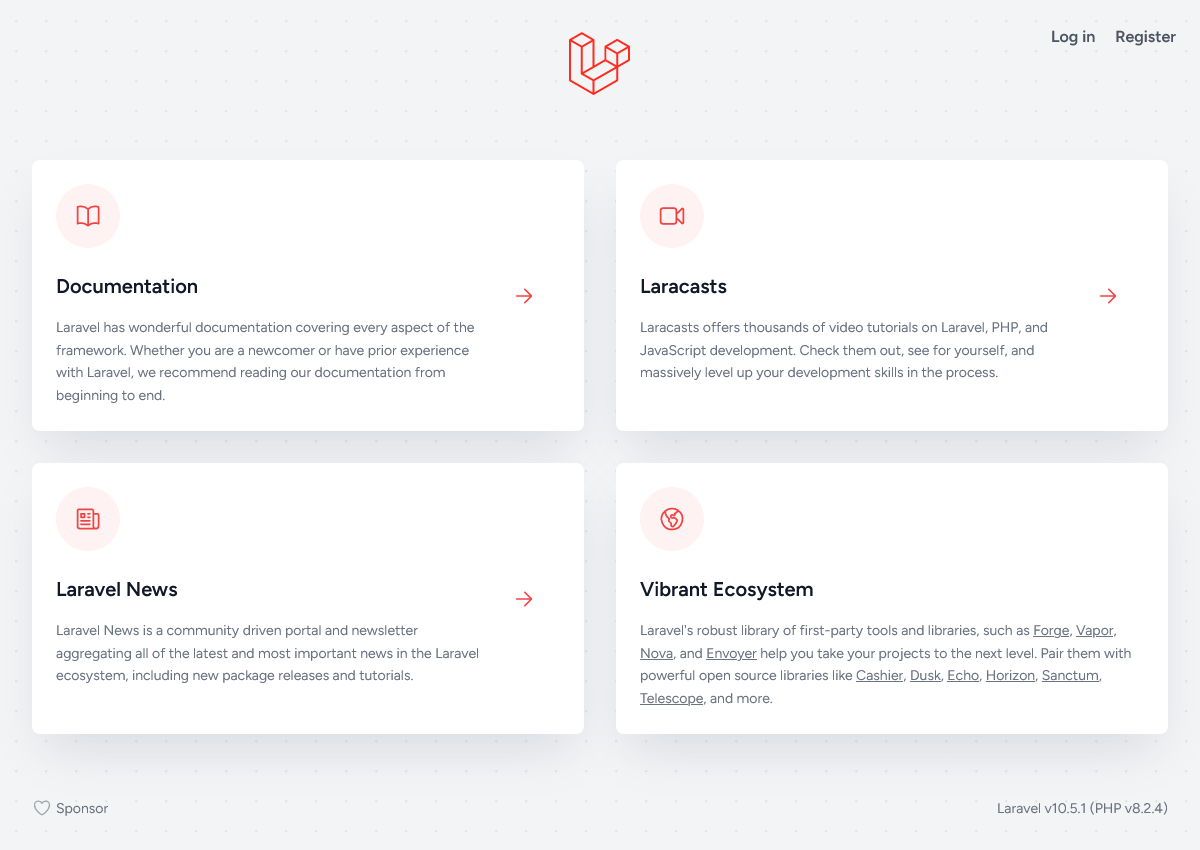
php artisan serveПосле запуска сервера, Artisan сообщит на каком порту сервер запущен (по умолчанию 8000). Открываем указанный адрес в браузере и видим стандартную страницу Laravel c Laravel Breeze.
При попытке перейти по на страницу https://localhost:8000/posts/ вас переадресует на страницу входа, как как доступ к управлению постами открыт только для пользователей вошедших в приложение. Создаём пользователя и в ходим в панель управления Posts.
Если вы хотите добавить в верхнее меню Dashboard пункт Posts, необходимо сделать следующее. В файле resources/views/layouts/navigation.blade.php после 17 строки, вставить фрагмент кода добавляющий пункт Posts:
          <x-nav-link :href="route('dashboard')" :active="request()->routeIs('dashboard')">
              {{ __('Dashboard') }}
          </x-nav-link>
+         <x-nav-link :href="route('posts.index')" :active="request()->routeIs('posts*')">
+             {{ __('Posts') }}
+         </x-nav-link>
      </div>
  </div>
Полный исходный код проекта, за исключением файла .env я выложил на GitHub.